[vc_row][vc_column][vc_column_text]Valentine’s Day is a day of love and sharing joy with family, friends, classmates, and all people in your life; it’s a day of hearts, flowers, candy, and appreciation cards. The first known Valentine’s day card goes way back to the year 1415 when a prisoner sent a card to his wife on Valentine’s Day; It is estimated that currently around 190 million cards are sent on Valentine’s Day.
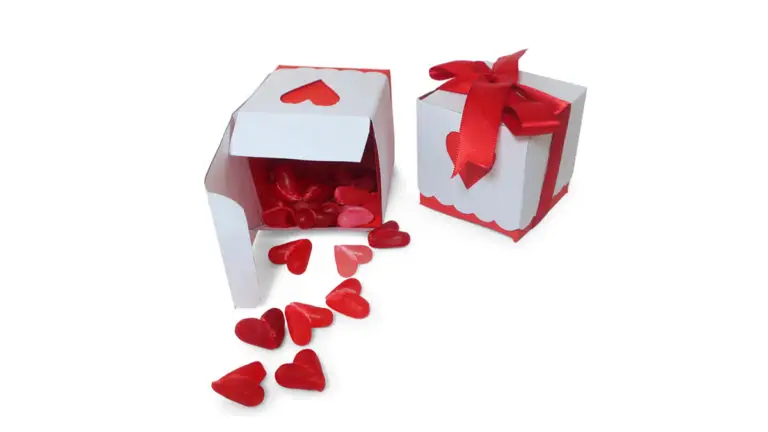
As parents, how can we give our children a positive Valentine’s Day experience that they will feel loved and cared for? Here is a creative and fun step by step craft that you can do with your children this Valentine’s Day. We will walk you through how to create some exciting and creative crafts to enhance your Valentine’s Day dinner table. So let’s not waste time and get right into it.[/vc_column_text][vc_empty_space][ultimate_heading main_heading=”RED HEART SHAPED GIFT AND CANDY BOX” alignment=”left”][/ultimate_heading][vc_column_text]Let’s begin by making your very own cute craft box shaped with a big red hart and a stuning red ribbon bow. We will use this to fill up with your jellies and treads and to enhance your Valatines Day dinner table. All you will need for this is a papper, sizzor, glue and ribbon.[/vc_column_text][vc_single_image image=”12918″ img_size=”full” style=”vc_box_rounded”][vc_column_text]Step1: Download our costom made template and cut out your top and bottom of your favor box in two different colors.[/vc_column_text][vc_btn title=”DOWNLOAD TEMPLATE” size=”lg” i_icon_fontawesome=”fa fa-arrow-circle-down” add_icon=”true” link=”url:https%3A%2F%2Fstaging.baketivity.com%2Fwp-content%2Fuploads%2F2020%2F02%2FBaketivity-Heart-Shaped-Box-Template.pdf||target:%20_blank|”][vc_empty_space][vc_single_image image=”12919″ img_size=”full” style=”vc_box_rounded”][vc_column_text]Step 2: Cut the hearts with a small sharp scissors[/vc_column_text][vc_empty_space][vc_single_image image=”12920″ img_size=”full” style=”vc_box_rounded”][vc_column_text]Step 3: Bend all folds with the black lines on the inside[/vc_column_text][vc_empty_space][vc_single_image image=”12921″ img_size=”full” style=”vc_box_rounded”][vc_column_text]Step 4: Bend all folds of the bottom of the favor box with the black lines on the inside[/vc_column_text][vc_empty_space][vc_single_image image=”12922″ img_size=”full” style=”vc_box_rounded”][vc_column_text]Step 5: Glue the ends together on the top and bottom of the favor box[/vc_column_text][vc_empty_space][vc_single_image image=”12923″ img_size=”full” style=”vc_box_rounded”][vc_column_text]Step 6: Fold the bottom of the favor box[/vc_column_text][vc_empty_space][vc_single_image image=”12924″ img_size=”full” style=”vc_box_rounded”][vc_column_text]Step 7: Place the top over the bottom of the favor box[/vc_column_text][vc_empty_space][vc_single_image image=”12925″ img_size=”full” style=”vc_box_rounded”][vc_column_text]Step 8: Close the cover[/vc_column_text][vc_empty_space][vc_single_image image=”12927″ img_size=”full” style=”vc_box_rounded”][vc_column_text]Step 9: Fill with red and pink jelly beans and wrap with red ribbon[/vc_column_text][vc_empty_space][vc_separator][vc_column_text]We would love to hear your comments and feedback on how this went for you, and best of all, if you can share with us some images of your final project![/vc_column_text][/vc_column][/vc_row]

